
We're all aware that multilingual stores have a greater shot at attracting international customers. But it's not just about translation – to really boost the customer experience, we've got to have language switching. Language switchers let customers explore your store in their preferred language and currency, making it a more user-friendly experience.
Unlike redirects, language switchers don't dictate what language a user sees on your store; they put the control in the hands of the user. This reduces potential frustration and confusion while navigating the website.
When it comes to language and currency switchers, one key thing to remember is that they need to be both visible and easy to find. Ultimately, your website visitors should know they can view your site in their preferred language.
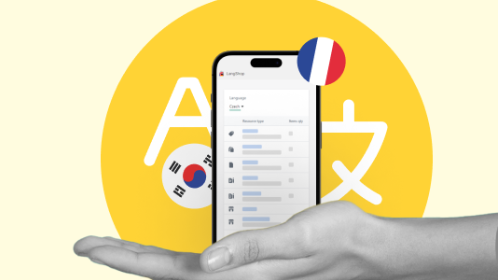
Now, there are various ways to add and place in a custom position a language and currency switchers on your Shopify store. The simplest way is by using a language switcher app or a language translator app. The second variant is more popular, because it ensures that there won’t create a conflict with the translation app. So in this post, we're going to show you how to add and position a switcher in a custom spot using the LangShop language translator app for Shopify.
Localize your entire store for foreign audiences with Langshop!
How to add a language switcher in Shopify
Step 1: Enable LangShop for your current theme
Before you dive into customizing your switcher, you’ll need to enable LangShop in App embeds for your current theme. This ensures that your switcher will work correctly with your store. For it, from your Shopify Admin navigate to Sales channels > Online Store > Themes and click customize next to the theme that you want to add switchers to.

Then, find the icon of App embed in the top-left corner and click it.

And using a toggle next to LangShop, enable the app and save configurations.

Step 2: Access Your LangShop Settings
To get started, log in to your LangShop admin panel and navigate to the "Settings" tab. Click on the "Switchers" option to begin configuring your language and currency switcher.

On the left sidebar panel, you will find a Language and currency switcher option. Here you can enable and customize your switcher.

Step 3: Customize Your Language & Currency Switcher
Now that you're in the "Language & Currency Switcher" section, you can fine-tune your switcher's appearance and functionality to match your store's design and branding. For it, click the Customize option.
Before we dive into customization, it's worth noting that you can tweak your switchers differently for various devices. For instance, you can set up distinct templates or positions for desktop and mobile users. This flexibility allows you to create an optimal user experience for your customers on different platforms.
General Customization
In the realm of general customization, you have several key areas to explore:
- Templates: This is where you choose the visual style of your switcher. Select a template that aligns with your store's overall look.
- Displayed Elements: Decide which elements you want your switcher to show: language, currency, or both.
- Language Label: Customize how the language element appears in the switcher: language code (DE), language name (German), or the native language name (Deutsch).
- Currency Label: Similar to language, you can choose between displaying currency names (US Dollar) or currency codes (USD).
- Position: here you can set a basic position of the switcher: top-left, top-right, bottom-left, bottom-right. For a custom position, like to set a switcher in navigation menu, you need to check Advanced settings.

Advanced Customization
The advanced settings tab gives you even more control over your switcher's appearance:
- Switcher Style: Customize flag rounding, background color, padding, font size, font family, font color, border width, border radius, and border color.
- Dropdown Style: Tailor the dropdown's appearance with options for background color, padding, font size, font family, font color, border width, border radius, border color, and switcher arrow size and color.

3. Dev Mode: And finally, here you can find a switcher tag that will help you implement your switcher into a custom position on your website. Let’s see it in more detail.
How to change language switcher position
So, you've set up your language and currency switcher using LangShop, and now you're looking to place it in a custom spot within your Shopify store - perhaps in your header, footer, or navigation menu. Fortunately, it's a straightforward process using a handy tool called the switcher tag. This tag enables you to display the switcher in a non-default location, offering you flexibility and control over its placement. Let's walk through the steps to make it happen.
If you skipped a switcher customization guide described above, here’s a quick route to a switcher tag: LangShop Admin > Settings > Language & Currency Switcher > Customize > Advanced > DEV MODE.
The DEV MODE section is the place where the magic happens. Copy the switcher tag to your clipboard. It will serve as the key to placing your switcher in the desired location. In our case, let’s place it near the cart icon in the header.
Move switchers to Header
To find the right spot for your switcher, you'll need to inspect the cart element. Right-click on the cart icon to reveal its location.

Now, open the theme liquid settings. You can do this by going to Shopify Admin > Sales channels > Online store. Then click … next to the theme you want to add a switcher to and select an Edit code option.

In your theme code, search for the "header.liquid" template. This is where the header section, including the cart element, is defined.
Within the "header.liquid" template, search for keywords related to the cart element. Look for an 'a' tag, href attribute with the cart link, or class attribute values that indicate the cart's location within this template.

Once you've identified the cart element, it's time to paste the switcher tag. You can place it either before or after the closing tag related to the cart element.

After pasting the switcher tag in the desired location, save your changes in the "header.liquid" template. Then, proceed to update your online store.
Create a multilanguage website in just a few steps with LangShop!
Move switchers to Navigation Menu
Just as you can customize the position of your language and currency switcher in various parts of your Shopify store, you can also integrate it seamlessly into your navigation menu. This allows you to provide easy access to language and currency options right where your customers are navigating your website.
Inspect the location of your menu, then in the Theme settings find the necessary template and look for an 'a href’ attribute with the link to an element that should locate next to your switcher. Then paste the switcher tag and save changes.
That’s so easy!
And don’t forget to publish your switcher by changing the status from Admin only to Published.
LangShop language translator app for Shopify
The Language and Currency Switcher is just the tip of the iceberg when it comes to what LangShop can do for your Shopify store. LangShop is a versatile Shopify language translator app that can take your store to the global stage by offering translation into up to 20 different languages.
But it doesn't stop there; LangShop goes above and beyond with a range of translation methods to suit your needs:

- AI Translation: Harness the power of artificial intelligence for quick and efficient translations.
- Pro Translation: Benefit from the precision of Google Cloud Translation and DeepL Pro to ensure accuracy.
- Agency Translation: Tap into the expertise of professional translation agencies for a polished and human touch.
- Manual Translation: Have full control with manual translation, allowing you to fine-tune every detail.
LangShop also assists you with currency conversion, offers glossaries, provides translation suggestions, and boasts a host of other localization features. It's your all-in-one solution for making your Shopify store accessible and appealing to a global audience.
Ready to take your store to the next level? Install LangShop today and unlock the full potential of multilingual and multicurrency e-commerce!


