Shopify is one of the most popular eCommerce platforms in the world, known for its flexibility and user-friendly interface. One of the features that makes Shopify so versatile is its ability to allow merchants to add custom fields to products, collections, and other entities within their store. This feature is highly valued among Shopify users, as it allows them to add extra information that can be useful for both customers and the store's backend.
To achieve this, Shopify offers a feature called "metafields". If you want to understand what Shopify metafields are and how they work, this article is for you. Here, you can also find information on how to translate Shopify metafields for your multi language store without a need to hire a Shopify expert for it. Let’s start!
What is metafield in Shopify
Metafields are a powerful tool that allows merchants to add custom data to products, collections, orders, customers, and more. In other words, they are a way to add custom fields to any entity in a Shopify store.
With Shopify metafields, merchants can add additional information to products that is not already captured by Shopify's default fields. For example, they can add a product's weight, dimensions, or any other custom attribute that is relevant to their business. This is particularly useful for businesses that sell unique or custom products that require additional information to be displayed on the storefront.
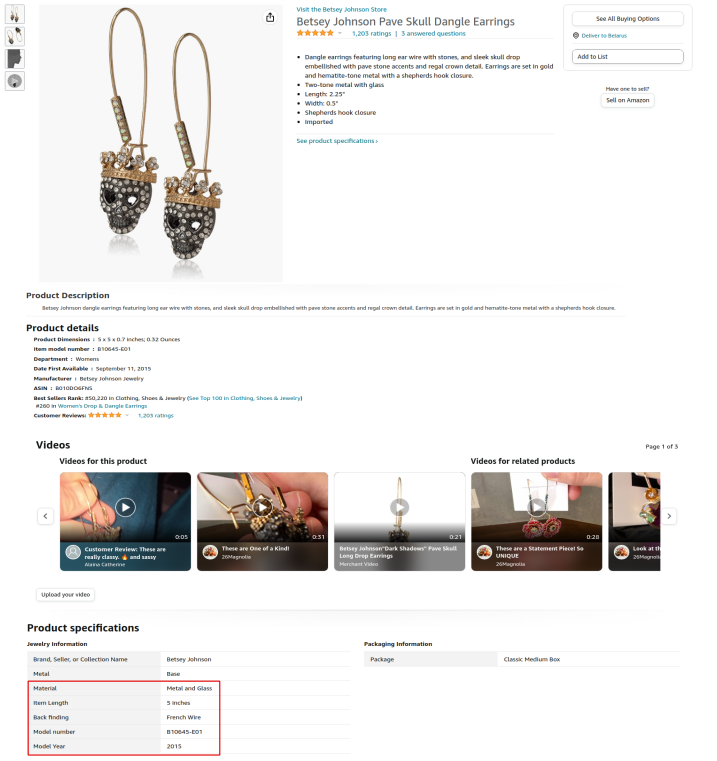
As an example, let's say you run a store that sells handmade jewelry. Each piece of jewelry you sell is unique and has specific details that are not captured by Shopify's default fields. To address this, you could add a metafield to each product called "Materials" that would allow you to specify the materials used to create that specific piece of jewelry.
How to add metafields in Shopify
To create Shopify product metafields or metafields for any other element of your store, you need to follow these three steps.
#1 Create a metafield definition
A metafield definition is the blueprint for the metafield. It defines the name, description, data type, and other properties of the metafield. You can create a metafield definition using the Shopify admin interface or the Shopify API.
For it, from Shopify Admin go to Settings > Custom data > Metafields > select the part of your store you want to create metafields for, for example Products > Add definition.
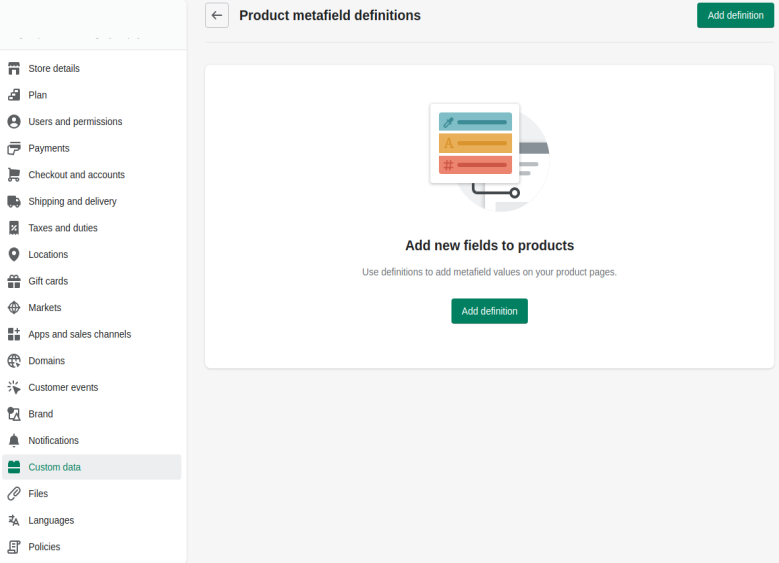
There are two types of metafield definition, standard and custom. As of Shopify recommendations, it’s better to use standard definition whenever possible, as they are automatically configured and customized to be fully compatible with Shopify.
Fill in the fields about your metafields. If you prefer standard definitions, use suggestions that appear while typing. You need to define metafield’s name, namespace and key, add description (optional) and specify access to storefront. Then, click the Select type button and specify the type of metafield value - getting ahead, we should mention that currently Shopify allows to translate Single line text and Multi-line text metafields, so if translation is your aim, you should pay attention to these content types. For your content type, specific Validation options will appear - set the validation rules carefully.
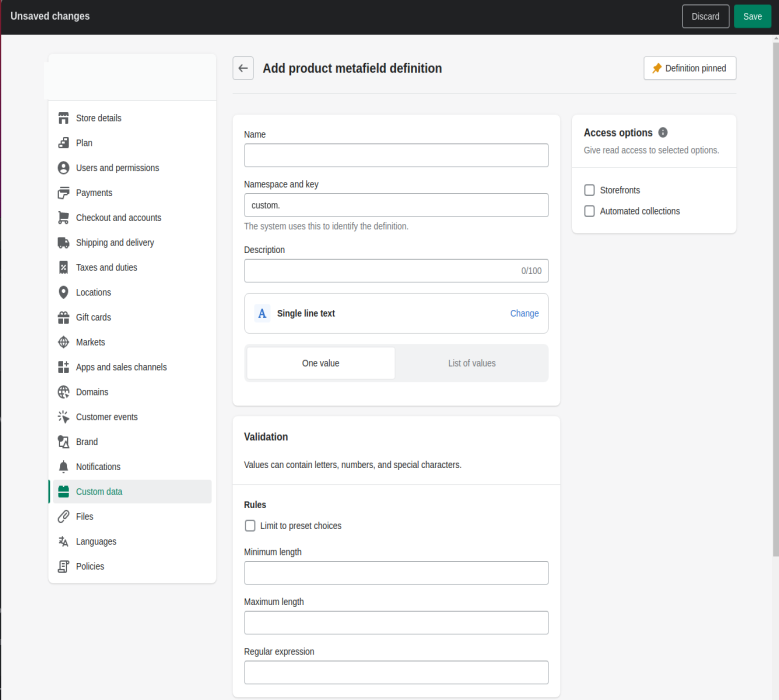
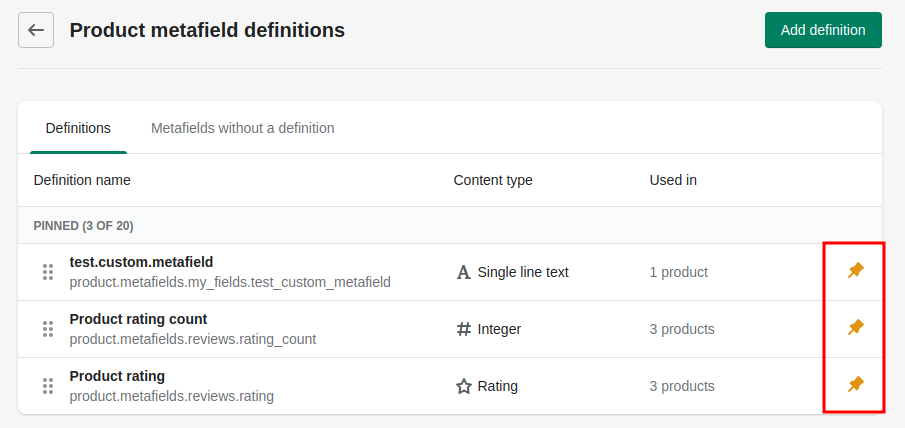
Once all is done, save your metafield definition and pin it to display on the corresponding pages in Shopify admin.
#2 Add values to metafields
Once you have created the metafield definition, you can add values to it. The values can be text, numbers, dates, or any other type of data that you want to store. They are located in the corresponding part of the store. For instance, if you have created a metafield definition for product expiration date, you can input the actual expiration dates on the product pages in your Shopify admin.
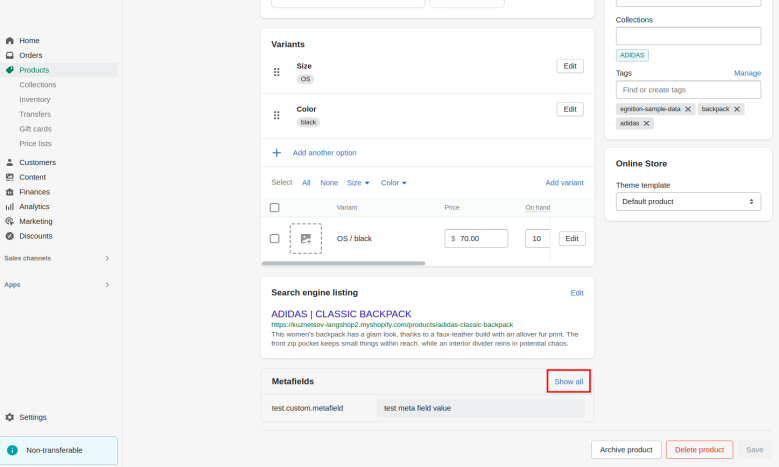
For it, open a product (or other instance your metafield belongs to), scroll down to the Metafields section and click Show all.
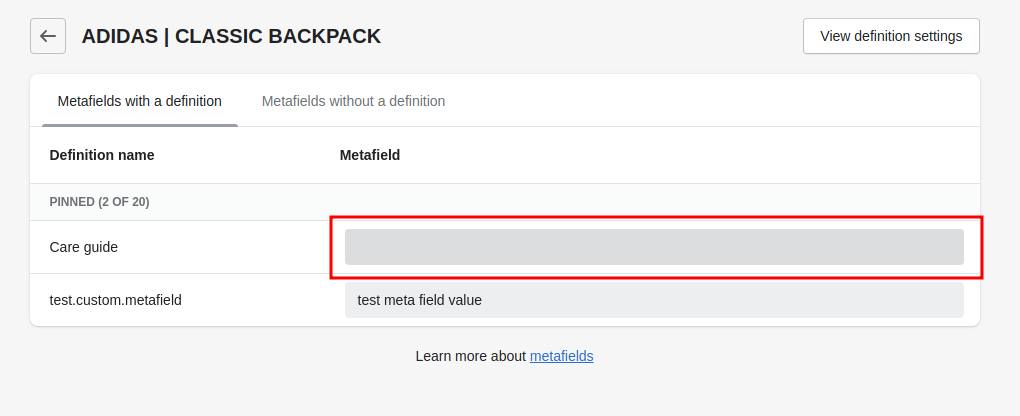
Click on the empty space next to the metafields to add its value. Same way you can add values for other metafields and products.
#3 Publish metafields on the store
After you have added values to the metafields, you need to connect metafields with your Shopify theme so that they display on the storefront.
For it, go to Sales Channels > Online Store > Themes and click the Customize button next to the current theme. In the top centered field, select Products > Default product.
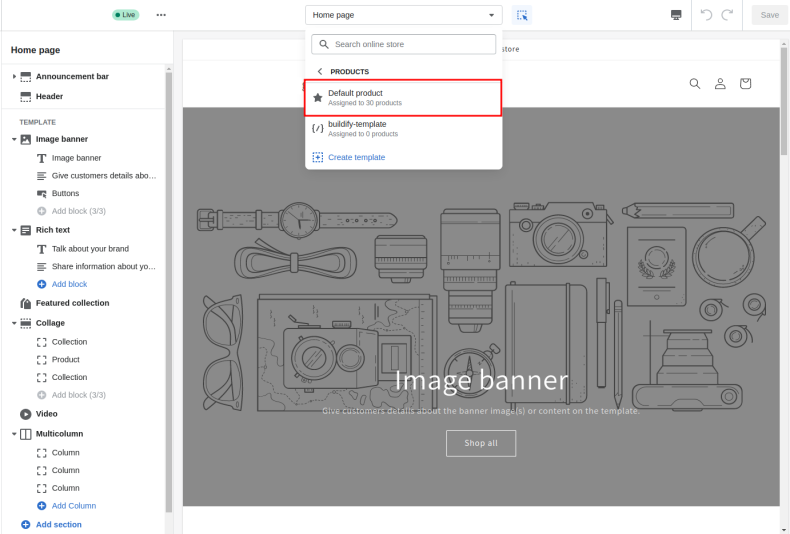
On the left sidebar, in the Product information section click Add block > Text. Then, click on the appeared Text block, it will redirect you to the text block, where you should give metafield a title and then click the icon > Add metafield.
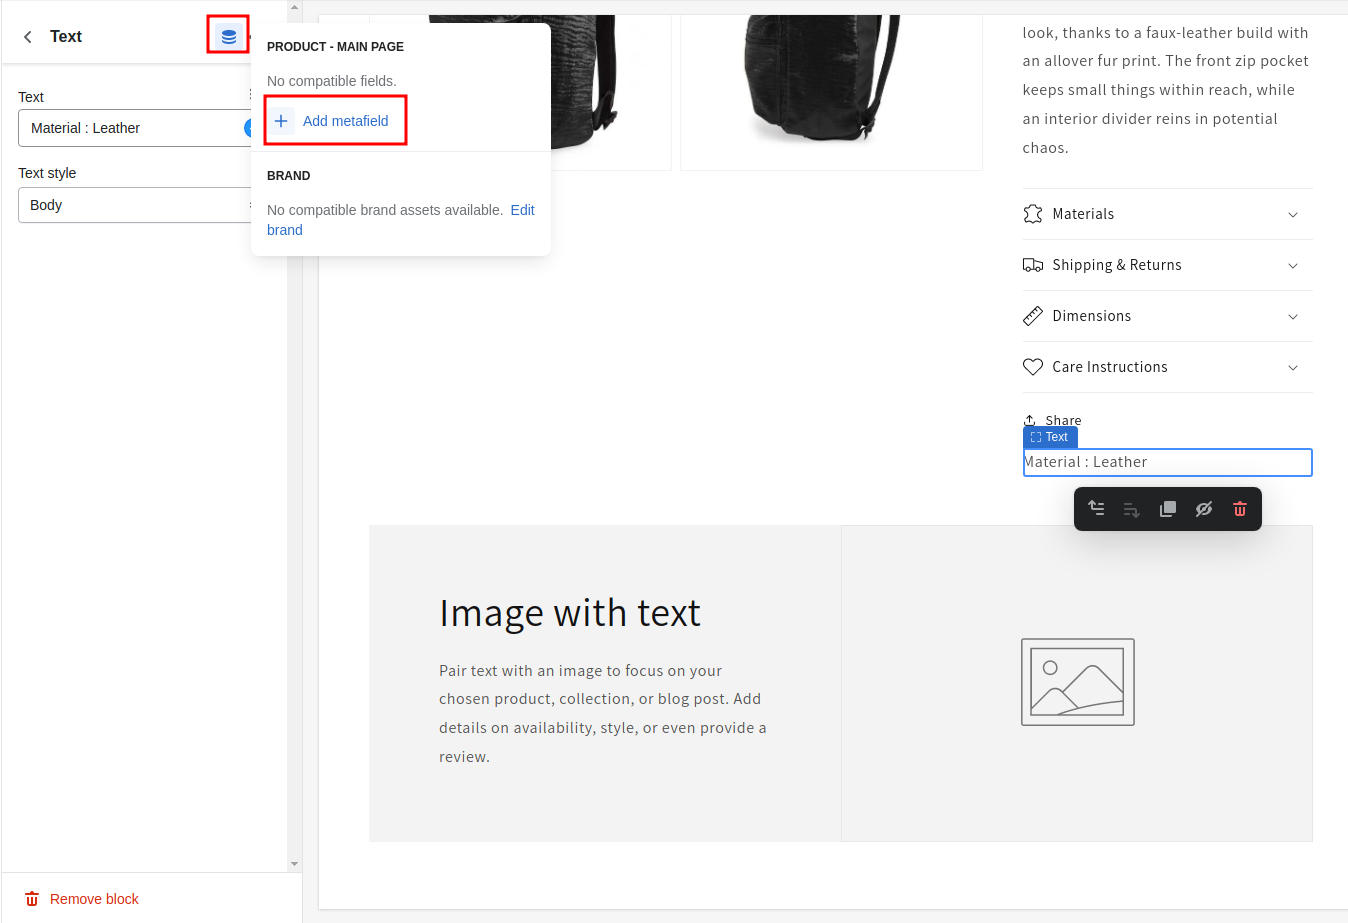
When all is done, save changes.
How to translate Shopify metafields
As previously mentioned, Shopify currently offers the ability to translate such types of metafields as single line text and multi-line text for products, product variants, and collections. This can be accomplished through the use of a language translator app. Among the various apps available, LangShop is a great example as it offers seamless integration with Shopify and allows you to translate your metafields automatically.
Let's discuss how to translate metafields in Shopify using the LangShop language translator app. Metafields are a part of a Shopify resource, such as a product, product variant, or collection, and can be translated using LangShop's resource translation configuration.
For example, to translate metafields for Shopify products, go to LangShop Admin and select Translation > Products. Next, choose the products you want to translate the metafields for and click on the Translate button. A window will appear asking you to select your preferred translation engine, languages, and whether to overwrite existing products.
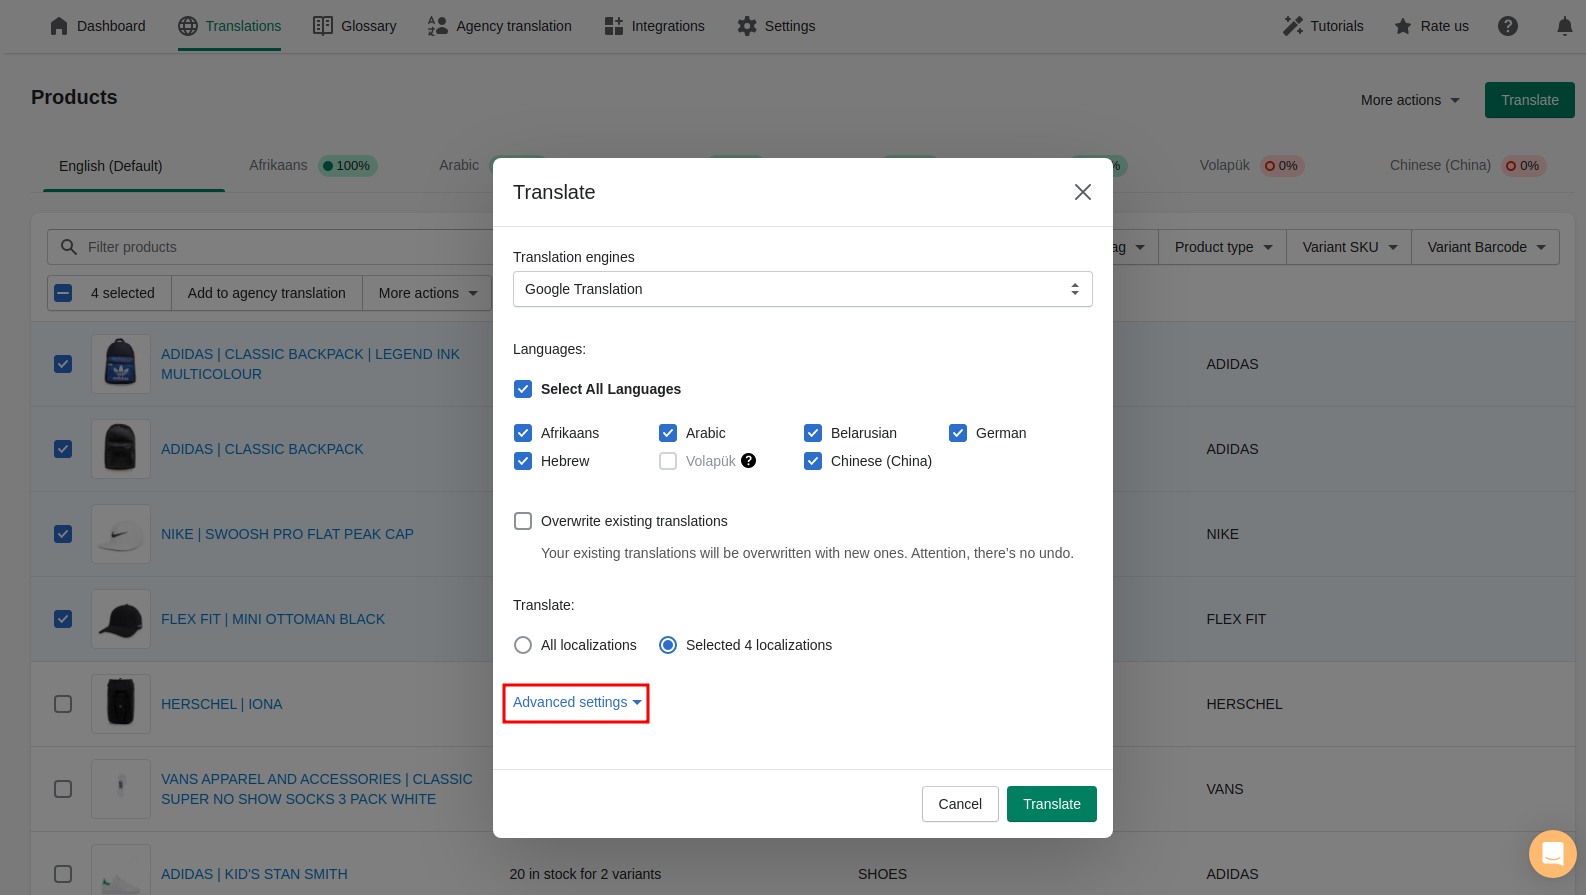
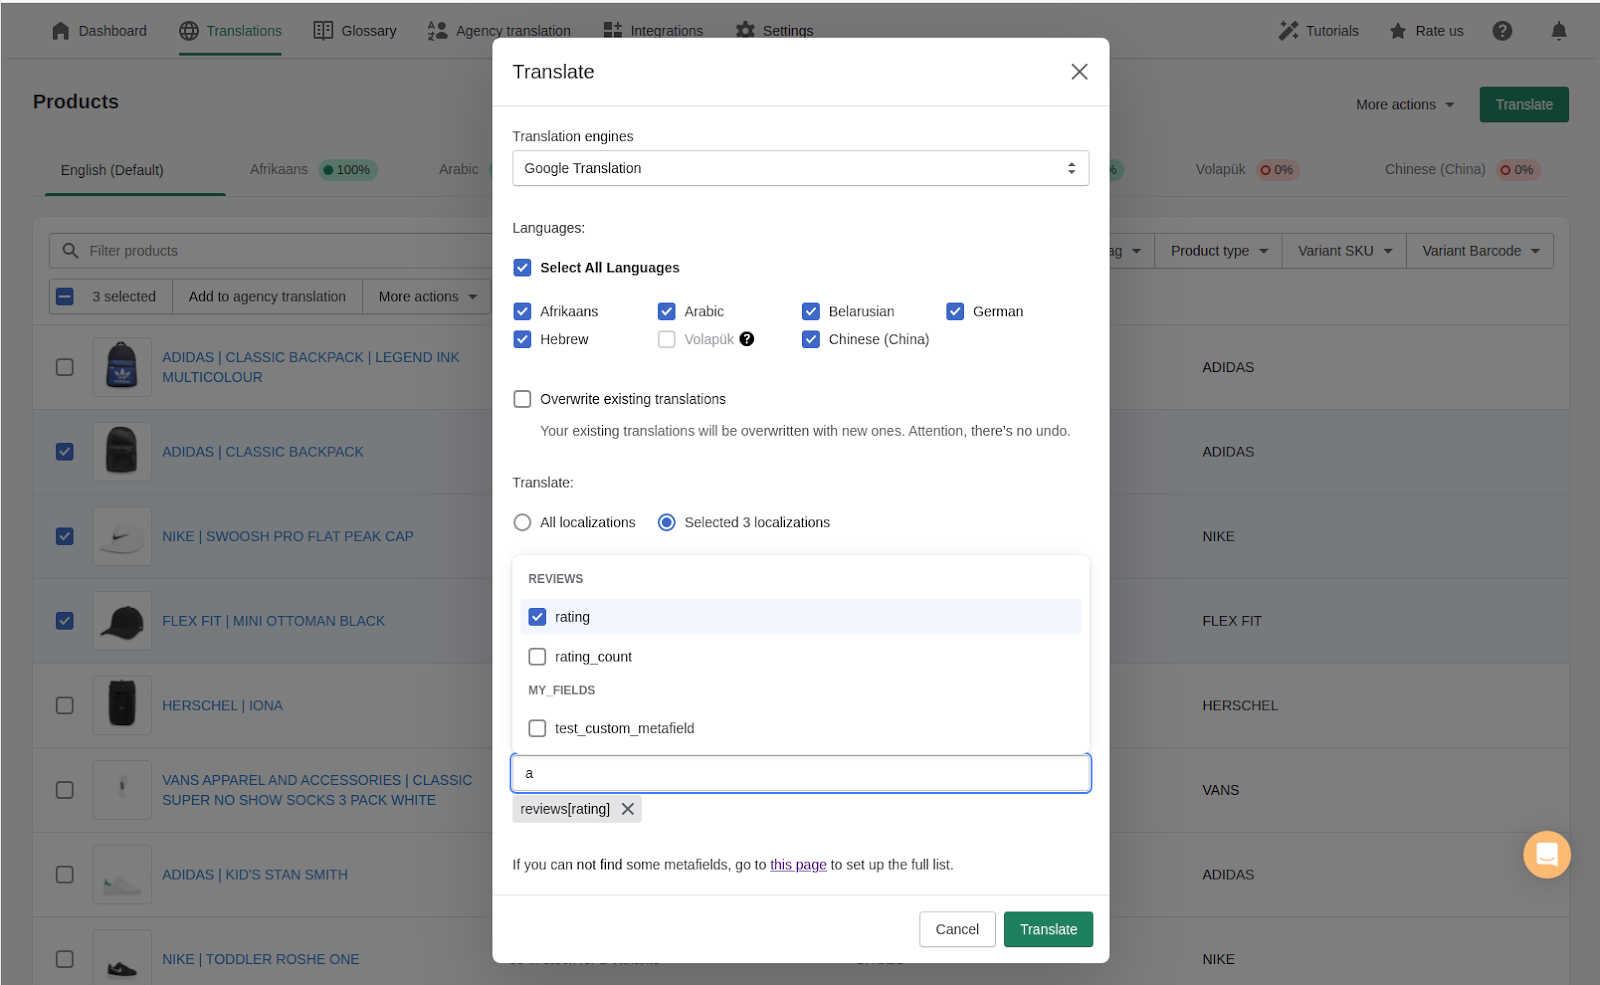
In the Advanced settings, check the Metafields box and set the cursor on the field to mark the metafields you want to translate. The list of metafields available will include those for up to 250 products. If you can't find the ones you want to translate, you'll need to create a list of all your translatable metafields.
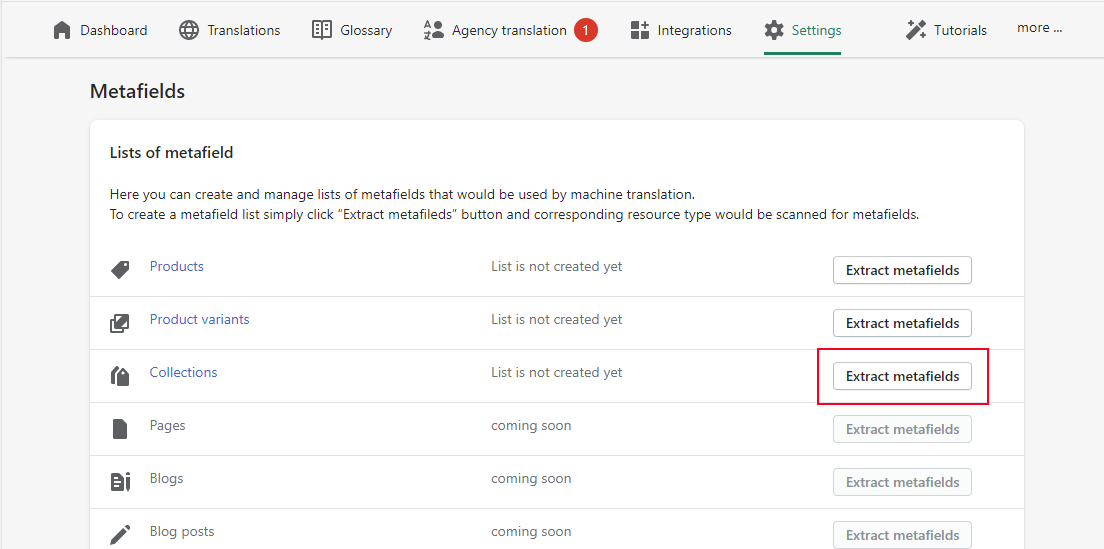
To create a list of your metafields, go to Settings > Metafields and click on the Extract metafields button next to Products. This will enable the system to scan all of your products and create a list of metafields. Select the metafields you want to translate and click the Set as Translatable button.
After creating the list, return to the product translation configuration and check the Metafields box in the Advanced settings. Now, when you set the cursor on the appeared field, all the translatable metafields appear according to your list, so you can select the ones you want to translate.
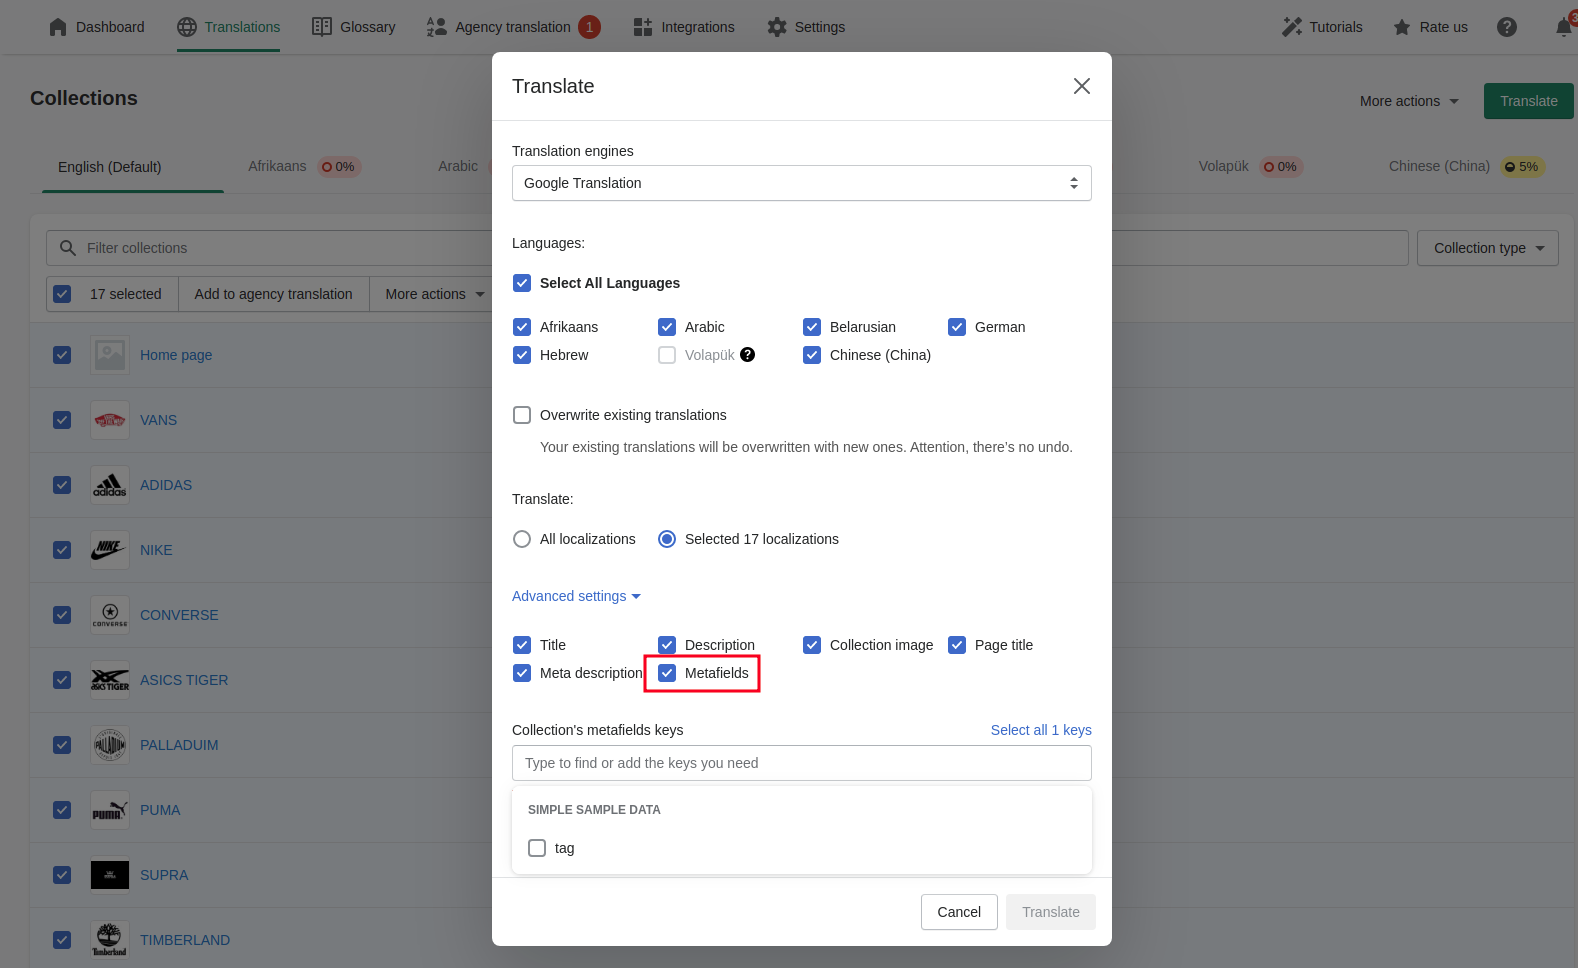
To enable translation, click the Translate button. With these steps, you can easily translate your Shopify metafields using LangShop.
Conclusion
Translating metafields is an important part of webstore localization, and the Shopify language translation apps play a crucial role in achieving it.
Install LangShop to easily translate metafields for products, product variants, and collections, ensuring that your store is accessible to customers around the world.
If you have any questions or need assistance with translating your metafields using LangShop, you can contact support team support@langshop.app. LangShop team is available 24/7 and is quick to respond.
